Saturday, 23 August 2014

Dreamin Vintage

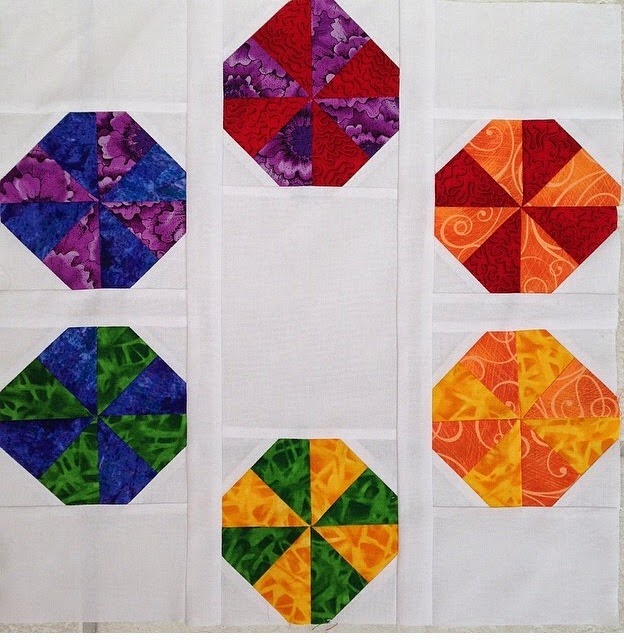
I think I posted a photo of the quick quilt I made using fabrics from the Dreamin Vintage collection a while back. If you missed it, here it is!


The collection is designed by Jeni Baker for Art Gallery Fabrics and I was really excited this week when I read one of her blog posts, to see my quilt featured in her round up of quilts she found that used to her fabric. You can read the blog post here 
http://www.incolororder.com/2014/08/your-dreamin-vintage-projects.html

I put together some instructions to make the quilt and you can find them in the September issue of Patchwork & Quilting


Joanna

Thursday, 21 August 2014

Creative Mojo

I'm not sure if I've lost mine. 

I have lots of ideas. See inspiration everywhere I go. And yet I don't seem to be able to create anything with a wow factor at the moment. 

Most of my piecing recently has been done on the machine and usually involves pre-cuts or cutting squares and triangles. These tend to lead to more simple but effective designs. 
Most of my wow quilts have been hand pieced and quilted. So maybe that's it? I haven't quite got the confidence to make something more challenging by machine?

Or is it more that I don't know where I am as a quilter at the moment? I like modern quilts but I don't think I'm a full on modern quilter. I am still a traditional quilter at heart but with modern quilter leanings. Labels for the type of quilter that I am shouldn't matter, but somehow not knowing what type of quilt I want to make has left me in limbo. 

I think it's also because I have made a lot of simpler quilts recently to display fabric collections that I have got out of the habit of making more complicated quilts. Although of course even the simplest designs can be stunning. 

Or maybe I just don't have the time to be fully creative; to sit down and design and create; to let the creative juices start flowing?

I think I need to start a new project!

Wednesday, 20 August 2014

Kittens!

If you follow me on other social media you will probably be aware that we have three new kittens in our lives!

Sadly we had to put our last cat Jacob down at the end of May. He'd been suffering from heart failure since the beginning of the year, but we'd managed to keep him going with pills and he was doing really well. However he went downhill very quickly that late bank holiday weekend so we took the emotional decision to put him to sleep.


It was absolutely awful being in a cat-free house. I'd come back home and wonder if he was sitting on the doorstep waiting for us......

So we decided not to be cat free and with my son's birthday fast approaching I started looking at rescue centre websites for kittens as a birthday present. I felt TK was the right age for looking after and appreciating kittens. 

Because we were going away in June for the Sandown quilt show we couldn't take any in before then but that very week three delightful balls of fluff appeared on the Wood Green Animal Centre's website. We dashed to the centre after school, literally, to go and see them. We had planned to get two kittens so they had each other for company; but in all honesty, could you leave one of these cuties behind?!


We went to see them every other day which helped them get to know us and we finally brought them home with us at the beginning of July. 

They've grown a lot since then but are still the cutest things. So say hello to Rolo, Smartie and Fudge, the main reason why I haven't done much seeing recently......

Joanna 

Saturday, 26 July 2014

July Update - Quilting

It's been a funny month. I'm sure I've done more than my July Bee blocks, but I'm struggling to think what!

Here's a quick update of my recent LBQB blocks.
Heidee chose the traditional Spinning Star block for her block for June. June was a really busy month for me so I only managed to get it done towards the end of the month. I tweaked it a little and made each of the points from little HSTs

 
Claire was Queen Bee for July and chose a block that has been featured in Love Patchwork & Quilting. Somehow I managed to forget to take a photo so I've pinched it from the Instagram feed

 
In our Modern Instabee it was Isobel's turn to be Queen Bee and she chose the Stacked Windmills block from the book. A lot of HSTs in this block but it avoided having bias edges all over the place. Isobel kindly supplied us with some of the fabrics for our blocks.

 
I've also been piecing with some wonderful fabrics called Terra Australis, but that's under wraps for now 

Monday, 23 June 2014

Quilting Update..........it's about time!

Oh dear! How long has it been since I've done a blog post? Let alone one on my quilting antics?
 
Too long is the answer!
 
Well lots has been going on, mainly with the two bees I've joined. I think my last post about my quilting was a tutorial for my Wonky Churn Dash block. This was for the month of May when I was Queen Bee in the LBQB. I received eleven wonderful blocks from my bee ladies and now all I need to do is decide how to put them all together in a quilt. I'm thinking of white sashing but adding something wonky at the posts. Because of the variety of colours used, I'm planning on picking up a charm pack or two when I go to the UK Robert Kaufman distributor in a week's time.
 
I'll do a proper post on my bee blocks once I've joined them together into my quilt.
 
The other bee I've joined is Instagram based. We are using the Modern Bee book by Lindsay Conner. I love most of the blocks in it and change my mind every month about which block I want everyone to make for me when it's my turn to be Queen Bee. That's not until March so I dare say there will be a few changes before then!
In the first month we made the Painter's Palette block for Gina. She asked us to make them a little different so I made mine with pinwheel blocks.
 
 
It was Catrin's turn in June and she chose the Come Together block, requesting certain colours in certain places. I loved putting this block together. It's a big one but so quick and easy to make!
 
 
I got to use some of my new fabrics in this block, which made me happy!
 
I've been making more blocks for my City Sampler quilt but concentrating on the striped version now.
 
And lastly here's a quick quilt I made using the wonderful Dreamin' Vintage fabrics I've got in stock. This collection just oozes summer and makes me smile.


Thursday, 8 May 2014

Allotment Update

Thought it was about time I posted an update on our progress on the allotment!

I'm also trying out the blogger app on my phone to see what the post looks like. 

So what have we been up to? Digging and planting! All the potatoes have gone in over the last month. The earlies are growing really well but we had a frost a week ago and even though a fellow plot holder covered them with fleece for me, they still got affected a little 


We planted out the sweet peas a couple of weeks ago after building a frame for them 


Most exciting of all the asparagus crowns arrived and started growing not long after planting them 


They've grown quite high now but again got affected a little by the frost. 

We've almost dug over the whole plot now and it's almost weed free, apart from the bindweed sprouting everywhere. 

Indoors we've sown tomatoes, sweet corn and Savoy cabbages. Last week the sweet potatoes slips arrived and it's exciting to see new growth on them already


So lots going on. And the most exciting news of all. . . . . . we have acquired a bench for our plot!


Sunday, 20 April 2014

LBQB - May

So the LBQB block for May............that's me!
 
I've been whetting the other Bee members' appetites with teaser tweets and mentions on Flickr, Instagram and Twitter but its now time for the big reveal..........
 
I finally decided on my block after swaying between a shortlist for weeks and decided to continue the wonky theme that we have going on and no pressure on subsequent Bee members to take it on further (although it would be nice).
 
So my block is..............a Wonky Churn Dash!
 
This is another of my favourite blocks and one I have used in several quilts. Its also quite easy to wonkify. In fact it should be possible to do it with any simple traditional block.
 
I looked up some tutorials and found a couple I found one I really liked but couldn't get my head about some of the piecing so I was going to go back to a basic Churn Dash like this one, but then I had a eureka moment and combined the best of both tutorials to make my own version!
 
Here's my trial block to see if it worked and also to find any potential pitfalls.
 
 
I was really pleased with how it came out! Really excited in fact!
 
So how to make it.......the tutorial bit!
 
The great thing about this block is you can use all kinds of small scraps, even those leftover from making Jenny's Wonky Log Cabin block this month.
 
Cut nine, 4.5" squares from a background fabric.
 
Join assorted scraps together to make a pieced rectangle 2" - 3" high and about 5" wide. If you cut angled strips it makes it a bit more interesting.
 
 
Trim the top and bottom edges so they are straight. Again they can be angled.
 
 
Position and stitch the pieced strip right sides together on one white background square ensuring that when it is flipped back over it will still cover the bottom edge of the white square. This is basically the same technique as we used in Lou's Wonky Star block.
 
 
Press the pieced strip down. Although a little trickier, it will look neater to press the seam towards the pieced strip.
 
 
Trim the bottom and side edges so that the unit measures 4.5" square and trim the excess white on the wrong side.
 
 
Repeat to make four side units, varying the width and angle of the pieced strips.
 
 
Make the corner units in a similar manner but make two pieced strips measuring approx. 5" wide by 6" high.
 
 
Trim the top and bottom edges as before


Cut the pieced strips in half across one diagonal to make triangles.


Position and stitch one triangle on a background square, ensuring again that it will cover all of the background square when its flipped back over.
 
 
Press and trim as before to complete a corner unit
 
 
Make four corner units. Each pieced strip will make two triangles.
 
Join the block pieces together in rows and then join the rows together to complete the block. If you press the seams in alternate directions it makes matching the seams a bit easier as there might be a bit of bulk depending on how many scraps you have used in your strips.
 
And voila! A finished block!
 
 
I'll post my actual wishes etc on Flickr. Hope you enjoy making it as much as I did!
 
Joanna