Sunday, 20 April 2014

LBQB - May

So the LBQB block for May............that's me!
 
I've been whetting the other Bee members' appetites with teaser tweets and mentions on Flickr, Instagram and Twitter but its now time for the big reveal..........
 
I finally decided on my block after swaying between a shortlist for weeks and decided to continue the wonky theme that we have going on and no pressure on subsequent Bee members to take it on further (although it would be nice).
 
So my block is..............a Wonky Churn Dash!
 
This is another of my favourite blocks and one I have used in several quilts. Its also quite easy to wonkify. In fact it should be possible to do it with any simple traditional block.
 
I looked up some tutorials and found a couple I found one I really liked but couldn't get my head about some of the piecing so I was going to go back to a basic Churn Dash like this one, but then I had a eureka moment and combined the best of both tutorials to make my own version!
 
Here's my trial block to see if it worked and also to find any potential pitfalls.
 
 
I was really pleased with how it came out! Really excited in fact!
 
So how to make it.......the tutorial bit!
 
The great thing about this block is you can use all kinds of small scraps, even those leftover from making Jenny's Wonky Log Cabin block this month.
 
Cut nine, 4.5" squares from a background fabric.
 
Join assorted scraps together to make a pieced rectangle 2" - 3" high and about 5" wide. If you cut angled strips it makes it a bit more interesting.
 
 
Trim the top and bottom edges so they are straight. Again they can be angled.
 
 
Position and stitch the pieced strip right sides together on one white background square ensuring that when it is flipped back over it will still cover the bottom edge of the white square. This is basically the same technique as we used in Lou's Wonky Star block.
 
 
Press the pieced strip down. Although a little trickier, it will look neater to press the seam towards the pieced strip.
 
 
Trim the bottom and side edges so that the unit measures 4.5" square and trim the excess white on the wrong side.
 
 
Repeat to make four side units, varying the width and angle of the pieced strips.
 
 
Make the corner units in a similar manner but make two pieced strips measuring approx. 5" wide by 6" high.
 
 
Trim the top and bottom edges as before


Cut the pieced strips in half across one diagonal to make triangles.


Position and stitch one triangle on a background square, ensuring again that it will cover all of the background square when its flipped back over.
 
 
Press and trim as before to complete a corner unit
 
 
Make four corner units. Each pieced strip will make two triangles.
 
Join the block pieces together in rows and then join the rows together to complete the block. If you press the seams in alternate directions it makes matching the seams a bit easier as there might be a bit of bulk depending on how many scraps you have used in your strips.
 
And voila! A finished block!
 
 
I'll post my actual wishes etc on Flickr. Hope you enjoy making it as much as I did!
 
Joanna 

Saturday, 12 April 2014

My Favourite Cake Recipe

I've finally found a sponge mix recipe that I really like on the BBC Good Food website so sharing the gist of it here so that I've always got it to refer to, and so I can remember where it came from!
The original recipe is for a lemon drizzle cake by Tana Ramsey which is one of our favourite cakes. We've made it both in a loaf tin and as small individual cakes.

I also used the base mix for some other cakes which came out nice and light and fluffy so this is the way to go. I think the difference must be the number of eggs used. In the past, I've probably used one or two eggs in a cake recipe and the results have always been a bit heavy and disappointing.

So here goes.........my new go to basic cake mix.

225g unsalted  butter
225g caster sugar
4 eggs
225g self raising flour

Its the usual method of creaming the butter and sugar together, adding the eggs one at a time before combining it with the flour.

So on today's to do list we're going to make marble cakes!

Joanna

Sunday, 6 April 2014

Day Trip to London

Its been a busy day today! And just as well really.
 
First thing this morning I took TK up to his Dad's place. They are heading off on a big adventure to New York City. I've been a bit daunted by this. Its his first trip to the States, longest flight and of course its without me. It will be the furthest and longest we have been apart since its been just the two of us. I know he will have a fantastic time, but its hard knowing he's doing it with his Dad and not me. Just another consequence of being divorced I guess.
I've been trying to persuade him to visit The City Quilter in NYC as its only about a dozen blocks from where they are staying. Don't think I have succeeded though.
 
I headed back home and then jumped on the train into London where I was meeting my friend and editing partner in crime, Emma, at a meeting of the London Modern Quilt Guild. They meet in Belgravia in a room above a pub in a private mews. I joined the meeting part way through as they were doing a show and tell. There were some lovely pieces shown by the members. Being my usual efficient self, I forgot to take any photos. Really must remedy that! They then had a demonstration by one member of curved piecing as they have a challenge each month and this month it was to make something with curves. A bit of chit chat followed and then we had a light lunch from of the bar downstairs, which was really yummy.
 
I had a great time and I'm tempted to join their guild as its my nearest one. I've thought about going down for a meeting on several occasions but being on my own and have childcare issues, its a bit difficult. I often feel I'm not in the right place when I go to regular quilt groups with my fabrics. But the LMQG felt a bit more like home. So maybe............just maybe!
 
Joanna

Wednesday, 2 April 2014

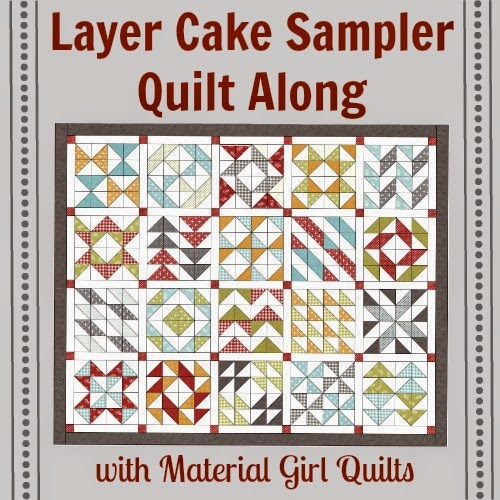
Layer Cake Sampler Quiltalong

I've been having fun taking part in this quiltalong designed and organised by Amanda at Material Girl Quilts. Every Friday Amanda has been releasing two new blocks and we've just passed the halfway point.
 
All you need to make the quilt is a layer cake of forty 10" squares and background fabric. This is what the finished quilt will look like
 
 
I decided to use a Splash Cracker pack which is Hoffman's version of a Layer Cake. However, I couldn't decide which background fabric to use; light or dark. So I decided to be a bit different and use both
 

I like to be a bit different every now and then. I'm a kind of 'What if.........' quilter.

So here are my blocks up to block 12, in sets of four. The finished size of the blocks are 16" square and I don't have a design wall or space big enough for all of them at once!


Blocks 1 to 4


Blocks 5 to 8
 
 
Blocks 9 to 12

I'm loving how my points are meeting nicely, I think because you trim the HST units before joining them. And I'm quite pleased with how using two fabrics for the background is working. It is meaning that I'm needing to think about the best arrangement for the blocks each time. Amanda gives you a couple of alternative layouts for each block too.

So only eight more blocks to go!

And finally..........you know I said I was a 'What if' kind of quilter? I thought I would make some more blocks using one of the Hoffman 1895 pre cut packs which are plainer fabrics and use a patterned batik for the background......and here are blocks 1 and 2 using Taffy


 Oh...........and I'm using a 5" charm pack instead of a layer cake so the HSTs are trimmed to 2" square making the finished blocks 6" instead of 16". I think they will all be quite cute!

Linking up with Amanda's halfway blog post and giveaway
 

Friday, 28 March 2014

What I've been up to - March

This month seems to have flown by and yet by birthday seems ages ago now! You will be glad to hear we managed to fit the tap to the water butt.........
 
So what have I been up to this month? With spring finally on its way I've finally managed to sow some seeds indoors. Some summer cabbages - Bourbon - germinated within a week
 
 
They are much bigger than this now and starting to get their next set of leaves. I'll need to re-pot them soon I think.
 
We also sowed some tomatoes and leeks which took a little longer to germinate but they are coming along nicely too now.
Added to these were sweet peas this week. So the conservatory is looking a bit like a greenhouse at the moment.
 
The potatoes are chitting nicely and we're hoping to get at least the earlies in this weekend as the weather is looking very mild
 
 
I've been busy digging over the potato bed in readiness for planting them out but there has been a frost this week.
 
Cooking-wise I made a delicious cream of leek soup this week after a fellow plot holder gave me a few leeks and we harvested the first of the rhubarb a couple of days ago (which the cat promptly sat on)
 
 
and we turned it into rhubarb and custard cake (without cat)
 
 
It took forever to cook because I made it in a loaf tin but it tastes pretty yummy!
 
My sewing has consisted mainly of making blocks for a layercakesampler quiltalong which is great fun


And I have also gone back to making my City Sampler blocks. I thought I would try something different and use a striped fabric in each block together with some Kona solids which my parents bought me for me birthday
 
 
And while its working quite well
 
 
These are blocks 1 to 6, I'm not 100% sure about it. Mainly I think because I thought I would arrange the blocks in a barn raising style........which means most of the blocks are green ones.....
 
So I've also added to the taupe ones I started.......
 
 
I'm making these blocks as a quiltalong with a couple of quilting friends as it does help to keep you going with them
 
So quite a lot done in March....and its not quite over yet!


Sunday, 2 March 2014

Full of the Joys of Spring part 2 - and a tutorial!

So the rest of my day yesterday was spent sewing.
 
And yesterday I made a quilt top! It was so quick and easy I've put a quick tutorial together as I'm thinking it has the possibilities to be as good as the #scrappytripalong that is all the rage online.
 
One of the marketing girls at the offices gave me a charm pack of thirty two 5" squares that are subscription gifts for a Sewing for Pleasure show the magazine is attending in a couple of weeks.
 
'What can you do with this?' she asked.
 
I wasn't immediately struck with inspiration but as usual the creative juices starting flowing and I have come up with this. It measures 38" square but if you kept adding blocks you could make a bed-sized quilt really quickly.........and use up a lot of scraps. You don't have to use one background colour either like I have done here, which would use even more scraps up!
 
 
I'm calling it a #scrappychurndash and here's how you make it.
 
What you need:
Assorted 5" square scraps or a charm pack
Matching background or assorted light or dark scraps. I used calico.
 
Cutting:
1. Cut 5" strips from your background and sub cut these into 5" squares.
 
Method:
1. Take one, 5" background square and cut it in half to make two, 2.5" x 5" rectangles.
2. Join these rectangles to opposite sides of one, 5" scrappy square. Press seams towards scrappy square.
 
 
3. Take one, 5" scrappy square and cut it in half to make two rectangles as before and join them to opposites sides of one, 5" background square. Press seams towards scrappy rectangles.
 
 
4. Cut this second pieced strip in half to make two, 2.5" x 9" rectangles.
 
 
5. Place these pieced rectangles on opposite sides of the first pieced strip.
 
 
6. Join the strips together to complete the block. It should measure 9" square (finished size 8.5" square) and the seams should nestle nicely because you have pressed them in opposite directions.
 
And hey presto one very quick and easy block!
 
 
What do you think? Want to play along too? If you do, tag your images #scrappychurndash
 
Joanna

Saturday, 1 March 2014

Full of the Joys of Spring!

Had a really productive day yesterday and it feels good when that happens. I may even need to do two different posts about it - that's how productive it was!
 
The beginning of March sees my birthday and yesterday was a lovely spring-like day. The daffs are just coming out at the front of the house
 
 
One of my birthday presents was a water butt for the allotment and as it was a nice day TK and I decided to go and set it up. Amazingly it did fit in the back of the Mini!
 

And yes he is inside the water butt as we tried to work out how to fit the tap!
 
Unfortunately, it went downhill from there.........
 
 
We didn't manage to fit the tap but at least its in situ
 
 
It will of course now stop raining, in which case.........you're welcome!
 
After TK had gone back home, I returned and turned over Bed 4 which was starting to sprout a few weeds. Trying to keep on top of them but its not easy. Bed 2 is quite grassy again and Bed 1 that I am in the middle of digging over is quite wet at the moment so need a few dry days before I can do some proper digging again.