Showing posts with label wonky churn dash. Show all posts

Monday, 23 June 2014

Quilting Update..........it's about time!

Oh dear! How long has it been since I've done a blog post? Let alone one on my quilting antics?
 
Too long is the answer!
 
Well lots has been going on, mainly with the two bees I've joined. I think my last post about my quilting was a tutorial for my Wonky Churn Dash block. This was for the month of May when I was Queen Bee in the LBQB. I received eleven wonderful blocks from my bee ladies and now all I need to do is decide how to put them all together in a quilt. I'm thinking of white sashing but adding something wonky at the posts. Because of the variety of colours used, I'm planning on picking up a charm pack or two when I go to the UK Robert Kaufman distributor in a week's time.
 
I'll do a proper post on my bee blocks once I've joined them together into my quilt.
 
The other bee I've joined is Instagram based. We are using the Modern Bee book by Lindsay Conner. I love most of the blocks in it and change my mind every month about which block I want everyone to make for me when it's my turn to be Queen Bee. That's not until March so I dare say there will be a few changes before then!
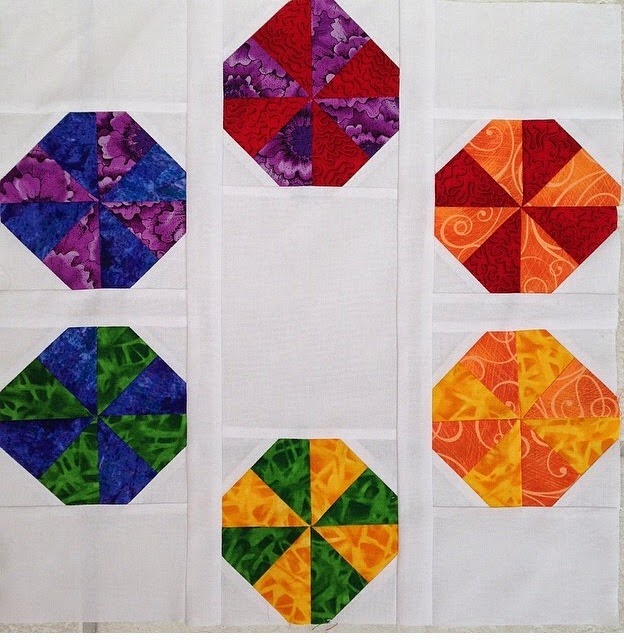
In the first month we made the Painter's Palette block for Gina. She asked us to make them a little different so I made mine with pinwheel blocks.
 
 
It was Catrin's turn in June and she chose the Come Together block, requesting certain colours in certain places. I loved putting this block together. It's a big one but so quick and easy to make!
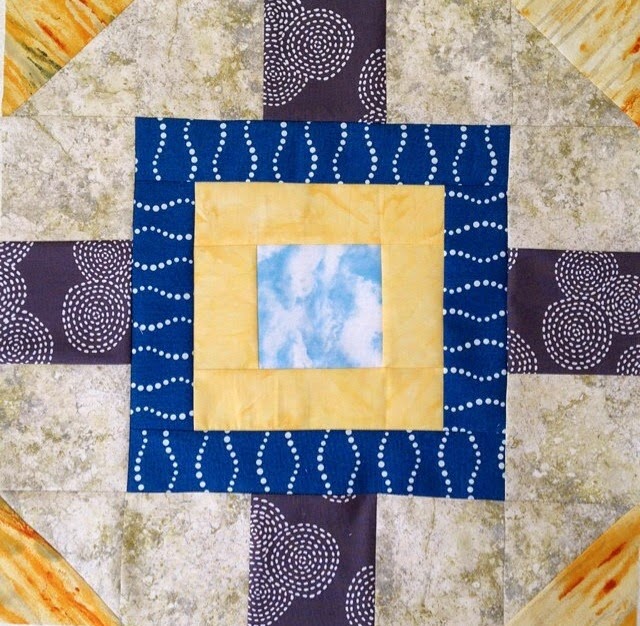
 
 
I got to use some of my new fabrics in this block, which made me happy!
 
I've been making more blocks for my City Sampler quilt but concentrating on the striped version now.
 
And lastly here's a quick quilt I made using the wonderful Dreamin' Vintage fabrics I've got in stock. This collection just oozes summer and makes me smile.


Sunday, 20 April 2014

LBQB - May

So the LBQB block for May............that's me!
 
I've been whetting the other Bee members' appetites with teaser tweets and mentions on Flickr, Instagram and Twitter but its now time for the big reveal..........
 
I finally decided on my block after swaying between a shortlist for weeks and decided to continue the wonky theme that we have going on and no pressure on subsequent Bee members to take it on further (although it would be nice).
 
So my block is..............a Wonky Churn Dash!
 
This is another of my favourite blocks and one I have used in several quilts. Its also quite easy to wonkify. In fact it should be possible to do it with any simple traditional block.
 
I looked up some tutorials and found a couple I found one I really liked but couldn't get my head about some of the piecing so I was going to go back to a basic Churn Dash like this one, but then I had a eureka moment and combined the best of both tutorials to make my own version!
 
Here's my trial block to see if it worked and also to find any potential pitfalls.
 
 
I was really pleased with how it came out! Really excited in fact!
 
So how to make it.......the tutorial bit!
 
The great thing about this block is you can use all kinds of small scraps, even those leftover from making Jenny's Wonky Log Cabin block this month.
 
Cut nine, 4.5" squares from a background fabric.
 
Join assorted scraps together to make a pieced rectangle 2" - 3" high and about 5" wide. If you cut angled strips it makes it a bit more interesting.
 
 
Trim the top and bottom edges so they are straight. Again they can be angled.
 
 
Position and stitch the pieced strip right sides together on one white background square ensuring that when it is flipped back over it will still cover the bottom edge of the white square. This is basically the same technique as we used in Lou's Wonky Star block.
 
 
Press the pieced strip down. Although a little trickier, it will look neater to press the seam towards the pieced strip.
 
 
Trim the bottom and side edges so that the unit measures 4.5" square and trim the excess white on the wrong side.
 
 
Repeat to make four side units, varying the width and angle of the pieced strips.
 
 
Make the corner units in a similar manner but make two pieced strips measuring approx. 5" wide by 6" high.
 
 
Trim the top and bottom edges as before


Cut the pieced strips in half across one diagonal to make triangles.


Position and stitch one triangle on a background square, ensuring again that it will cover all of the background square when its flipped back over.
 
 
Press and trim as before to complete a corner unit
 
 
Make four corner units. Each pieced strip will make two triangles.
 
Join the block pieces together in rows and then join the rows together to complete the block. If you press the seams in alternate directions it makes matching the seams a bit easier as there might be a bit of bulk depending on how many scraps you have used in your strips.
 
And voila! A finished block!
 
 
I'll post my actual wishes etc on Flickr. Hope you enjoy making it as much as I did!
 
Joanna